A Pecha Kucha presentation follows a simple 20×20 format = 20 slides, each with 20 seconds of content. This rule helps you communicate with your audience effectively in just 6 minutes and 40 seconds, without losing their attention.
The main motive of the Pecha Kucha presentation is to share ideas or thoughts with your audience in short, crisp language or visuals. Today, I’ll let you know what a Pecha Kucha Presentation is, how to use it, the pros, cons, and more. So, stay engaged, without skipping any crucial part of this discussion.
What is a Pecha Kucha Presentation?
The name Pecha Kucha comes from a Japanese phrase meaning “chit-chat.” Its simple meaning is presentation format should be concise and avoid unnecessary talking to ensure the audience is attentive from start to end.
A Pecha Kucha presentation has some strict criteria, including:
- Allowed to use only 20 slides
- Each slide is shown for 20 seconds, without pausing or extending the time per slide
- The presentation advances automatically
- The total presentation time is 6 minutes and 40 seconds
This criterion should be strictly followed if you’re making a Pecha Kucha presentation. This structure makes it different from a traditional presentation.
Why Pecha Kucha Was Created?
Pecha Kucha was created in 2003 by Astrid Klein and Mark Dytham. Both were architects based in Tokyo, and their goal was simple:
Stop presenters from talking too much and boring the audience.
I personally used this 20×20 format in my educational presentation on AI, and honestly, my audience was literally attentive and acknowledged. So, for me, this helps a lot.
Key Characteristics of a Pecha Kucha Presentation
I hope you clearly understand what a Pecha Kucha presentation is and what the 20×20 rule is. Now, it’s time to learn the characteristics of this:
- The presentation moves quickly
- Images tell the story more than words
- Slides have concise text
- There is no time to talk unnecessarily
- The audience stays focused and interested
So, I don’t rely on slides to explain everything. Slides support my story; they don’t replace it.
When do I Use a Pecha Kucha Presentation?
I usually choose the Pecha Kucha format when:
- Want to share ideas
- Speaking at events or online
- Need attention fast
- Sharing a creative idea
It works best for:
- Design talks
- Startup ideas
- Teaching sessions
- Portfolios
- Stories
Also read: How to Convert PowerPoint to Google Slides (PPT & PPTX) – Step-by-Step
100+ Pecha Kucha Presentation Topics and Ideas
Choosing the right topic is one of the most important parts of creating a successful Pecha Kucha presentation. Since you only have 6 minutes and 40 seconds to tell your story, it’s best to choose a topic that can be explained visually and broken into 20 small ideas.
Here are some of the best Pecha Kucha presentation topics for students, professionals, teachers, and creative presenters.
Pecha Kucha Topics for Students
- My Dream Career
- How Social Media Affects Teenagers
- Climate Change and Its Impact
- The Future of Artificial Intelligence
- Study Habits That Improve Grades
- Importance of Mental Health
- Renewable Energy Sources
- The History of the Internet
- Space Exploration
- Cybersecurity Basics
- The Science of Sleep
- Benefits of Reading Books
- Famous Historical Leaders
- The Evolution of Smartphones
- Sustainable Living Practices
- Digital Marketing Basics
- Healthy Eating Habits
- Time Management Skills
- Online Learning vs Traditional Learning
- The Future of Education
Creative Pecha Kucha Presentation Ideas
- A Day in My Life
- My Favorite Travel Experience
- Photography Through My Lens
- Lessons Learned From Failure
- The Power of Storytelling
- My Creative Process
- The Art of Minimalism
- Designing My Dream Home
- Music That Changed My Life
- Building Better Habits
- Life Lessons From Movies
- How Technology Shapes Creativity
- Personal Growth Journey
- My Bucket List Adventures
- The Psychology of Colors
Pecha Kucha Topics for College Presentations
- Artificial Intelligence in Education
- Cryptocurrency and Blockchain
- Future of Remote Work
- Impact of Social Media Marketing
- Women in Technology
- Entrepreneurship for Students
- Data Privacy and Security
- Climate Action Strategies
- Sustainable Business Models
- E-commerce Growth Trends
- Digital Transformation
- Innovation in Healthcare
- Electric Vehicles
- Smart Cities
- The Gig Economy
Pecha Kucha Topics for Business Presentations
- Startup Success Stories
- Customer Experience Strategies
- Brand Building Techniques
- Future of Workplaces
- Leadership Lessons
- Productivity Hacks
- Company Culture Development
- Business Innovation
- Marketing Trends
- AI in Business Operations
- Sales Growth Strategies
- Personal Branding
- Remote Team Management
- Workplace Diversity
- Business Automation
Funny Pecha Kucha Topics
- Why Mondays Feel So Long
- The Secret Life of Pets
- Things We Pretend to Understand
- Worst Fashion Trends Ever
- Funny Childhood Memories
- Strange Internet Trends
- The Evolution of Memes
- Why We Procrastinate
- Awkward Social Situations
- Things Everyone Does but Never Admits
Pecha Kucha Topics About Technology
- Artificial Intelligence
- Machine Learning Applications
- Virtual Reality
- Augmented Reality
- Cloud Computing
- Robotics
- Internet of Things
- Quantum Computing
- Smart Homes
- Future Technologies
- Digital Ethics
- Cybersecurity Threats
- Generative AI Tools
- Autonomous Vehicles
- 5G Technology
Pecha Kucha Topics About Society and Culture
- Cultural Diversity
- Gender Equality
- Social Media Influence
- Volunteer Work
- Human Rights
- Globalization
- Digital Citizenship
- Community Building
- Cultural Traditions
- Future of Communication
Easy Pecha Kucha Topics for Beginners
- My Favorite Hobby
- My Favorite Book
- My Favorite Movie
- Lessons From Sports
- Benefits of Exercise
- Travel Destinations I Want to Visit
- Daily Productivity Tips
- Morning Routines
- Importance of Friendship
- Learning New Skills
How to Choose the Best Pecha Kucha Topic
When selecting a Pecha Kucha topic, ask yourself:
- Can I explain it in 20 slides?
- Can I find strong visuals for every slide?
- Is the topic interesting to my audience?
- Can I tell a story instead of just sharing facts?
- Can I keep the message simple and memorable?
The best Pecha Kucha presentation topics are visual, engaging, and easy to divide into 20 short segments that fit the 20×20 format.
How to Create a Pecha Kucha Presentation
Creating a Pecha Kucha presentation is simple when you follow the 20×20 rule. The challenge is organizing your ideas so they fit within the limited time available.
Step 1. Choose a Clear Topic
Select a topic that can be explained visually and divided into 20 key points. Topics that involve storytelling, creativity, education, business ideas, or personal experiences work especially well.
Step 2. Outline Your Story
Before designing slides, create a structure for your presentation. Divide your story into:
- Introduction
- Main points
- Supporting examples
- Conclusion
Since you only have 20 slides, every slide should contribute to the overall narrative.
Step 3. Create 20 Slides
Build exactly 20 slides and assign one idea to each slide. Avoid overcrowding slides with text or multiple concepts.
Step 4. Use Strong Visuals
Pecha Kucha presentations rely heavily on images, illustrations, charts, and graphics. Visuals should support your message rather than distract from it.
Step 5. Write a 20-Second Script
Prepare approximately 40–50 words for each slide. This helps you stay within the 20-second time limit.
Step 6. Enable Automatic Slide Transitions
Set each slide to automatically advance after 20 seconds. This is one of the defining characteristics of a Pecha Kucha presentation.
Step 7. Practice Repeatedly
Practice several times to ensure your speaking pace matches the automatic slide progression. Rehearsal is essential for delivering a smooth presentation.
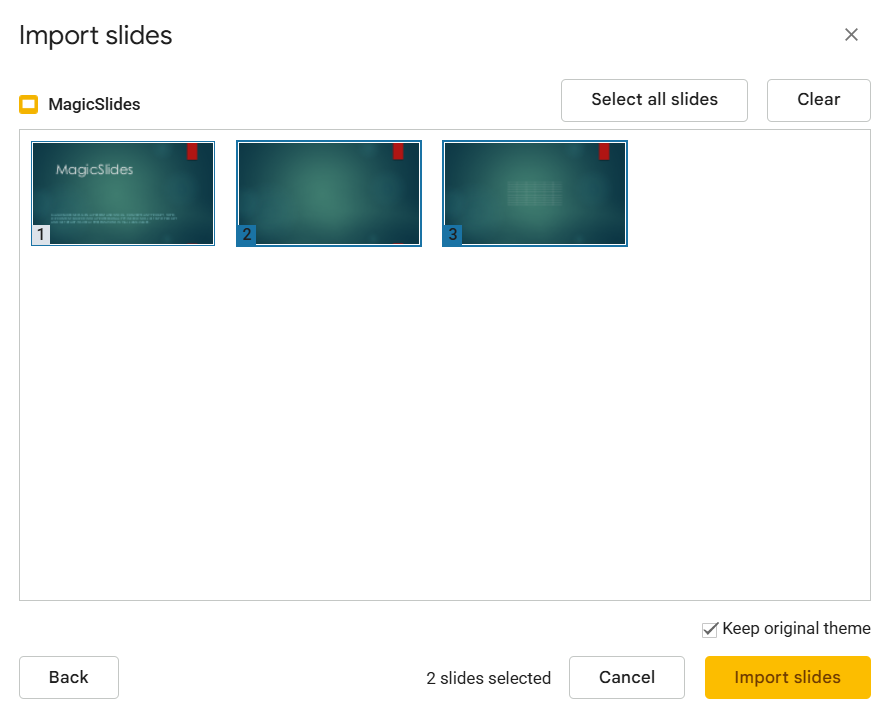
Create Pecha Kucha Presentations Faster with MagicSlides AI
Designing 20 perfectly timed slides can take hours when done manually. If you want to create a Pecha Kucha presentation quickly, MagicSlides AI can help.
With MagicSlides AI PPT Maker, you can generate presentation outlines, create visually appealing slides, and organize content into a clear storytelling structure within minutes.

Whether you’re creating:
- Student presentations
- College projects
- Business presentations
- Startup pitches
- Educational lessons
- Creative storytelling presentations
MagicSlides AI helps you build professional presentations faster while maintaining the simplicity and visual appeal required for the Pecha Kucha format.
Benefits of a Pecha Kucha Presentation
Here are some advantages of this, which I personally found:
- Keeps people focused and interested the whole time
- Finishes quickly, so it does not waste time
- Each slide shows only one idea, making it easy to understand
- Does not allow long or unnecessary talking
- Helps give a clear and strong message
Limitations of a Pecha Kucha Presentation
While this format has numerous benefits, it’s not perfect for every situation:
- Deep technical topics
- Complicated data
- Step-by-step lessons
- Long training sessions
If I need to explain something slowly or take audience questions during the presentation, Pecha Kucha isn’t the best choice.
Pecha Kucha vs Traditional Presentation
If you want a quick difference between Pecha Kucha and a Traditional presentation. Then:
- Normal presentations can be flexible, but take a long time
- Pecha Kucha presentations are strict but powerful
With Pecha Kucha, I focus on clear ideas, timing, and story, not slides or length.
Tips I Follow to Create an Effective Pecha Kucha Presentation
Here’s what works for me:
- Make a script for 20 seconds per slide
- Put one idea on each slide
- Practice many times to match the slides
- Use good pictures, not lots of text
- Keep my message easy to remember
Preparation is everything in this format.
Is Pecha Kucha Still Relevant Today?
Yes, Pecha Kucha is very useful now because people have short attention spans, and many presentations are online. I can give value quickly whether I present online or in person.
Author’s Verdict
To me, a Pecha Kucha presentation is not just a format; it’s a powerful, strict structure that helps me to engage my audience effectively.
If you want to improve your presentation skills, I strongly recommend trying Pecha Kucha at least once. Now, you know what a Pecha Kucha presentation is, so use this knowledge and even share it if you like it.
People Also Ask
Q1. Can Pecha Kucha be used online?
Yes, it works well online because quick slides keep people interested.
Q2. What type of visuals work best?
I use pictures and simple graphics, not lots of text, to show my story clearly.
Q3. Can Pecha Kucha work for group presentations?
Yes, each person can present a few slides, but everyone must practice timing to stay on track.
Q4. Is Pecha Kucha suitable for beginners?
Yes, beginners can do it, but they need to practice and use one idea per slide.